The potatoes are the part that can fool you: they mash up smooth and buttery, but while they’re warm, the mixture is too soft to shape neatly. I learned to give it time to cool all the way through before forming these potato croquettes. Once cold, the mash feels firm in your hands, and each oval takes its coating without slumping.
Russet potatoes make a fluffy base, and warming the milk helps it blend into the mash without cooling it down mid-mix. Drain the potatoes well before mashing; extra water is the enemy of a mixture that needs to hold its shape. Butter and parsley bring the familiar, savory potato flavor, while a fine breadcrumb coating turns crisp and golden in the skillet.
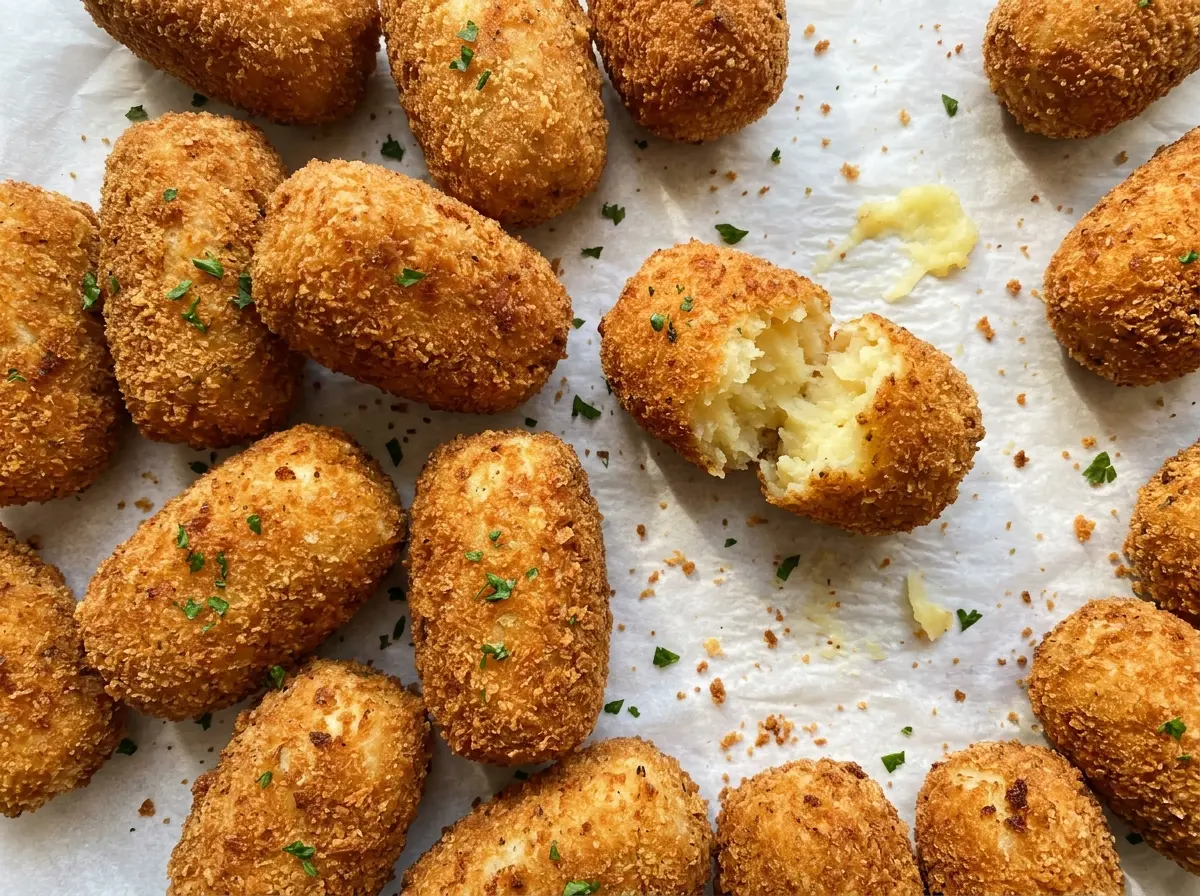
Each croquette has a thin, crunchy shell around a soft center, with just enough parsley to keep the potato from tasting flat. They’re a satisfying way to turn a simple pot of mashed potatoes into something crisp, oval, and ready to share.
Kitchen Note
Let the oil come back near 350°F between batches instead of adding the next croquettes right away. That small pause helps the coating brown promptly rather than lingering in oil that has cooled down.
Save these potato croquettes for a crisp, golden coating and a soft, buttery potato center.
Why Cold Potato Mixture Makes Croquettes Easier to Bread
Warm mashed potatoes are soft enough to spread, but that same softness makes shaping and coating frustrating. A formed oval can flatten as you lift it, and the flour may drag across the surface instead of making an even first layer. Cooling the mash until it’s cold and firm gives the starch time to set, so the portions are easier to handle through the flour, egg, and crumbs.
That chill also helps keep the inside tender without adding a binder to stiffen the potato. Spread the mixture in a shallow dish so it cools evenly, then cover it once it has cooled and refrigerate it for at least an hour. Don’t try to rush the shaping while the center is still warm; the outside can feel cool while the middle remains soft. When the mixture is firm throughout, you can shape the ovals with clean edges and press on the crumbs without crushing them.
There’s a useful contrast in the finished croquette: a delicate potato interior and a crisp shell. Keeping the mash smooth and cold gives both parts a chance to come through.
What Russets and Fine Breadcrumbs Contribute to These Croquettes

- Russet potatoes — Their starchy, fluffy texture makes a smooth mash that firms up well when chilled. Choose potatoes that feel solid, without soft spots. Yukon Gold potatoes can work, but their naturally creamier, less fluffy texture gives you a slightly denser filling.
- Warm whole milk and unsalted butter — Together they make the potato filling creamy without turning it into a loose purée. Warm the milk before mixing so it incorporates smoothly. If whole milk isn’t available, 2% milk works, though the mash will be a little less rich; keep the butter in place for the same buttery texture.
- Fresh parsley — Chopped parsley adds a clean, fresh note against the rich potato. Use leaves that look bright and perky, and chop them shortly before mixing so they don’t turn limp. Dried parsley won’t give the same fresh flavor or flecks, so fresh is the better choice here.
- All-purpose flour and eggs — Flour gives the egg something to cling to, and the beaten egg helps the breadcrumbs adhere. Keep the bowls shallow so you can turn each oval without smearing its surface. The order matters: flour first, egg second, crumbs last.
- Plain fine breadcrumbs — Fine crumbs make a close, even coat that browns uniformly and stays in proportion to the soft center. Plain crumbs let the parsley and potato remain the main flavors. Coarse crumbs create a rougher, less even shell, so the fine texture is worth choosing.
- Vegetable oil — Its neutral taste lets the potato and parsley come through. Use a heavy skillet so the oil heats and fries more steadily; there’s no need for a specialty frying oil for this shallow-frying method.
From Smooth Mash to a Crisp, Even Shell
Cook the potatoes until they mash without resistance
Put the peeled, 1-inch potato pieces in a large pot and cover them with water by about an inch. Bring the water to a boil over high heat, then reduce the heat and simmer for 12–15 minutes. Check a piece with a fork; it should slide in easily, with no firm center. Drain the potatoes well, return them to the pot, and mash until smooth before mixing in the butter, warm milk, salt, pepper, and chopped parsley.
Cool the mash until it’s firm throughout
Spread the potato mixture in a shallow dish rather than leaving it in a deep mound. Let it cool, then cover and refrigerate it for at least 1 hour, until cold and firm. The shallow layer helps the center cool along with the edges. If the mixture still feels soft when you press it, give it more time in the refrigerator before shaping.
Shape the ovals and build the coating in order
Divide the chilled mixture into 12 portions and shape each one into an oval about 3 inches long. Set out three separate shallow bowls for the flour, beaten eggs, and breadcrumbs. Coat each oval in flour, dip it in egg, then roll it in the crumbs, pressing gently so they adhere. If a croquette starts to lose its shape, set it down and handle it lightly rather than squeezing the potato.
Fry in batches and drain briefly
Pour the vegetable oil into a 12-inch heavy skillet to a depth of about 1 inch and heat it over medium heat. Fry the croquettes in batches without crowding the skillet, turning as needed, for 4–5 minutes, until golden brown all over. Crowding makes it harder to turn them without bumping the coating. Transfer each batch to a wire rack or paper towel-lined plate and let it drain for 2 minutes before serving.
Three Useful Ways to Adapt the Croquettes
Make the coating gluten-free
Use a gluten-free all-purpose flour blend in place of the all-purpose flour, and plain fine gluten-free breadcrumbs in place of the regular breadcrumbs. Keep the same flour-egg-crumb order and use the same quantities of coating. The crust may be a little more delicate, so turn the croquettes gently as they brown.
Shape smaller croquettes for appetizer portions
Divide the chilled mixture into smaller portions instead of 12, keeping each piece evenly sized so they brown at the same pace. Smaller croquettes give you more crisp coating in each bite and are easy to serve as finger food. Begin checking them before the full frying time, since their smaller size can make them brown sooner.
Form flatter patties instead of ovals
Shape the same portions into compact, flattened patties for a wider, crunchier surface. Keep the patties thick enough to hold together when you turn them, and use a thin spatula to lift them from the skillet. The flatter shape changes the texture balance, with more crust around each bite and less of the oval’s soft center.
Storage and Reheating
- Refrigerator: Keep cooked croquettes covered in the refrigerator for 3–4 days. The crumb coating softens as it sits, but it crisps again when reheated.
- Freezer: Let cooked croquettes cool, freeze them in a single layer until firm, then transfer them to an airtight freezer container for up to 2 months. The coating may lose some crispness in storage, but reheating helps restore it.
- Reheating: Warm them in a 375°F oven until crisp and hot in the center; reheat leftovers to 165°F. Avoid the microwave if you want to keep the coating crisp, since it softens the breadcrumbs.
Questions That Come Up When Making Potato Croquettes
Potato Croquettes
Ingredients
Equipment
Method
- Put the russet potatoes in a large pot and add 8 cups water; add more water if needed to cover them by about 1 inch.
- Bring to a boil over high heat, then reduce the heat and simmer for 12–15 minutes, until the potatoes are fork-tender.
- Drain the potatoes well, return them to the pot, and mash until smooth.
- Mix in the unsalted butter, warmed whole milk, kosher salt, black pepper, and chopped fresh parsley.
- Spread the potato mixture in a shallow dish and let it cool, then cover and refrigerate for at least 1 hour, until cold and firm.
- Divide the chilled mixture into 12 portions and shape each into an oval about 3 inches long.
- Set out the all-purpose flour, beaten eggs, and plain fine breadcrumbs in three separate shallow bowls.
- Coat each croquette in flour, dip it in egg, then roll it in breadcrumbs, pressing gently so the crumbs adhere.
- Pour the vegetable oil into a 12-inch heavy skillet to a depth of about 1 inch and heat over medium heat to 350°F.
- Fry the croquettes in batches without crowding the skillet, turning as needed, for 4–5 minutes, until golden brown all over; keep the oil near 350°F between batches.
- Transfer the croquettes to a wire rack or paper towel-lined plate and let drain for 2 minutes before serving.