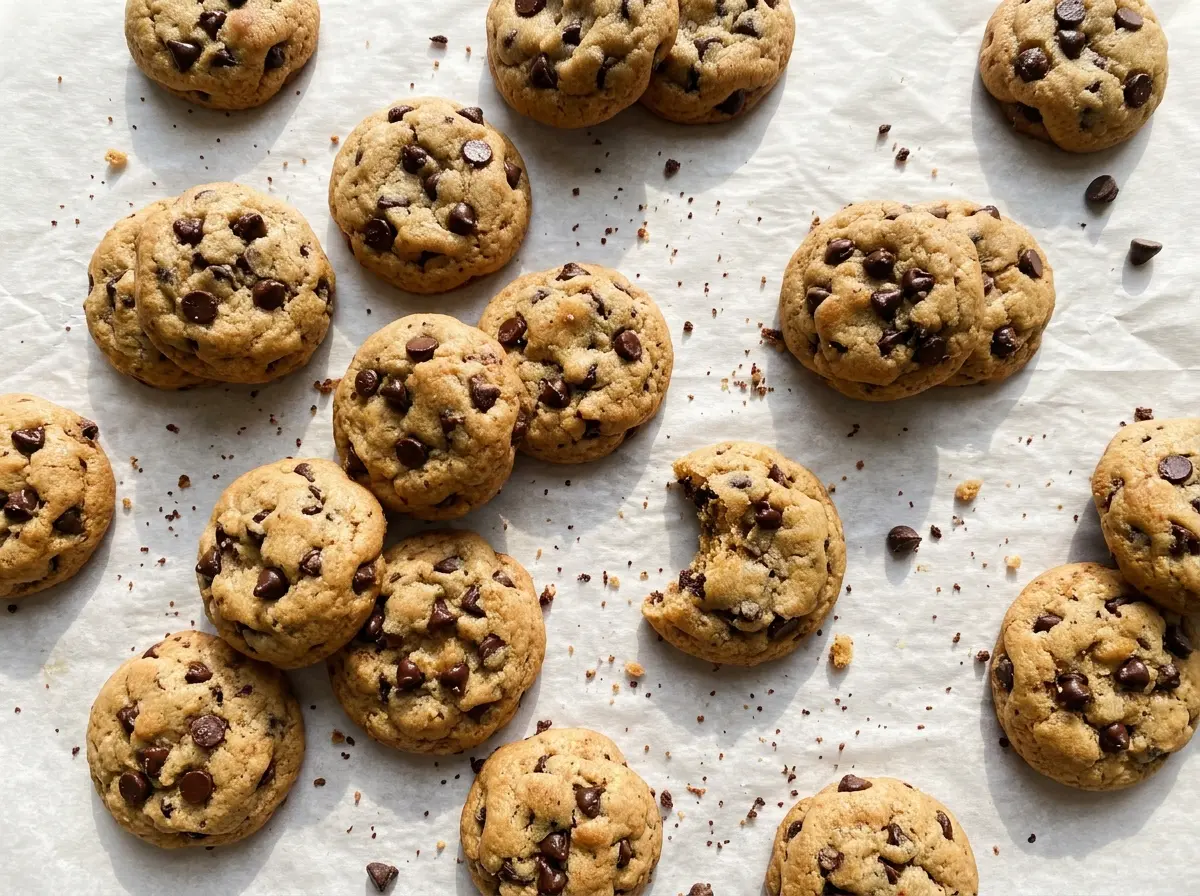
The first cookies on the tray always tell me how close I am to the edge: at 8 minutes, the tops can look set while the centers are still soft, and another minute changes their texture. That quick shift is part of baking small cookies. These Mini Chocolate Chip Cookies are sized with rounded teaspoons, so the batch makes 48 little cookies with chocolate in each bite.
I cream softened butter with both sugars before adding the egg and vanilla, then stop mixing the flour as soon as the dry patches disappear. That keeps the dough from getting worked more than it needs to. Mini chocolate chips suit the small portions, and a short rest on the baking sheet helps the cookies hold together before they move to a rack. The edges turn lightly golden, the tops look set, and the centers stay tender.
Kitchen Note
Let the baking sheet cool completely before the next round goes on. Dough on a warm sheet starts softening before it reaches the oven, which can make the next batch spread differently.
Save these Mini Chocolate Chip Cookies for a bite-size bake with crisp golden edges and soft centers.
Why Mini Cookies Need a Closer Look Near the End
A small cookie has less distance between its edge and center than a standard-size cookie. That means the edge can brown while the middle is still soft, and the change from tender to dry happens quickly. The small portions are exactly what make these cookies easy to snack on, but they also mean you should watch the tray rather than rely on color alone.
Look for lightly golden edges and tops that have lost their wet sheen and look set. The centers may still feel soft when the pan comes out; they firm as the cookies sit on the hot sheet. Pulling them when they reach those visual cues gives you a tender middle instead of waiting for the whole cookie to feel firm in the oven.
A few details help keep the batch consistent:
- Use rounded teaspoons so the portions bake at a similar pace.
- Leave about 2 inches between portions; the dough needs room to spread.
- Keep your attention on the oven during the 8–10 minute bake window, since smaller cookies can move from pale to overbaked fast.
Why Mini Chips and Softened Butter Matter in This Dough

- Mini chocolate chips — Their smaller size spreads chocolate through the small cookies without leaving oversized pockets in every bite. Choose chips that taste good on their own; there isn’t much else in the dough competing with the chocolate. Keep them mini for the most even distribution.
- Softened unsalted butter — Soft butter creams smoothly with the sugars, while melted butter changes the dough’s texture and how it spreads. It should give slightly when pressed, not look oily or collapsed. Unsalted butter also lets the measured kosher salt provide the seasoning.
- Light brown sugar and granulated sugar — The two sugars work together in the dough: brown sugar brings moisture and a deeper caramel note, while granulated sugar keeps the sweetness brighter. Pack the brown sugar into the measuring cup so the amount is consistent.
- Room-temperature egg — A room-temperature egg blends into the creamed butter and sugars more readily than a cold one. If you forgot to take it out early, place the egg in a bowl of warm—not hot—water until it no longer feels cold, then dry it before cracking.
- All-purpose flour, baking soda, and kosher salt — Whisking these together first spreads the leavening and salt through the flour, so there aren’t concentrated pockets in the finished cookies. Measure the flour without packing it down; too much flour can leave the dough stiff and the cookies less tender.
- Vanilla extract — Vanilla rounds out the sweetness and supports the chocolate. Use the extract you already enjoy; a costly bottle isn’t necessary for this small amount.
From Creamed Butter to a Tray of Evenly Baked Minis
Cream the Butter and Sugars Until Smooth
Beat the softened butter with the granulated sugar and packed light brown sugar in a large bowl for about 2 minutes. The mixture should look creamy and evenly combined, without visible streaks of butter. Scrape down the bowl if sugar is clinging to the sides. Starting with butter that’s too cold makes it harder to cream evenly.
Blend in the Egg and Vanilla
Beat in the room-temperature egg and vanilla extract until combined. The mixture should look cohesive, with no pool of egg sitting at the bottom of the bowl. Stop once everything is incorporated; beating longer doesn’t help the cookies. If the mixture looks a little uneven at first, keep mixing just until it comes together.
Add the Flour Mixture Without Overworking It
Whisk the flour, baking soda, and kosher salt together in a medium bowl, then add them to the butter mixture. Mix only until no dry flour remains. The dough should hold together and look soft, not glossy from prolonged mixing. Once the last flour streak disappears, stop; extra mixing can make the cookies tougher.
Fold in the Chips and Portion the Dough
Fold in the mini chocolate chips so they are distributed through the dough without crushing or smearing them. Drop rounded teaspoons onto a parchment-lined large rimmed baking sheet, leaving about 2 inches between portions. Keep the portions close in size so they finish together. If dough sticks to the spoon, use another spoon to help release it rather than adding flour.
Bake to the Edges, Then Let the Centers Set
Bake at 350°F for 8–10 minutes, until the edges are lightly golden and the tops look set. The cookies will still be delicate when they come out, so leave them on the baking sheet for 5 minutes before transferring them to a wire rack. Bake the remaining dough on the fully cooled sheet. Moving warm cookies too soon can break their soft centers.
Two Ways to Change the Size or Texture Without Changing the Dough
Make a Larger Cookie
For a less bite-size cookie, portion the same dough in larger mounds instead of rounded teaspoons. You’ll get fewer cookies, and the 8–10 minute range is for the mini portions, so use the lightly golden edges and set-looking tops as your doneness cues rather than assuming the larger cookies finish at the same moment.
Turn Cooled Cookies into Crumbs
Let the cookies cool fully, then crumble a few by hand for a crunchy cookie crumb. The mini chocolate chips stay visible, so the crumbs have little chocolate pockets throughout. Use a light touch if you want distinct pieces; pressing them firmly makes a finer crumb.
Storage and Reheating
- Room temperature: Store fully cooled cookies in an airtight container for up to 5 days. They soften a little as they sit, but remain good for snacking.
- Freezer: Freeze fully cooled cookies in an airtight freezer-safe container for up to 2 months. Separate layers with parchment so the cookies don’t stick together; thaw at room temperature.
- Reheating: These cookies are good at room temperature. To warm one, microwave it briefly and check before heating again; too long makes the small cookie hot and overly soft.
Questions I Get Asked About These Mini Cookies
Mini Chocolate Chip Cookies
Ingredients
Equipment
Method
- Preheat the oven to 350°F.
- Line a large rimmed baking sheet with parchment paper.
- In a large bowl, beat the butter, granulated sugar, and brown sugar until creamy, about 2 minutes.
- Beat in the egg and vanilla until combined.
- In a medium bowl, whisk together the flour, baking soda, and salt.
- Add the flour mixture to the butter mixture and mix just until no dry flour remains.
- Fold in the mini chocolate chips.
- Drop rounded teaspoons of dough onto the prepared baking sheet, spacing them about 2 inches apart.
- Bake for 8–10 minutes, until the edges are lightly golden and the tops look set; bake remaining dough on the fully cooled sheet.
- Cool the cookies on the baking sheet for 5 minutes.
- Transfer them to a wire rack to cool.