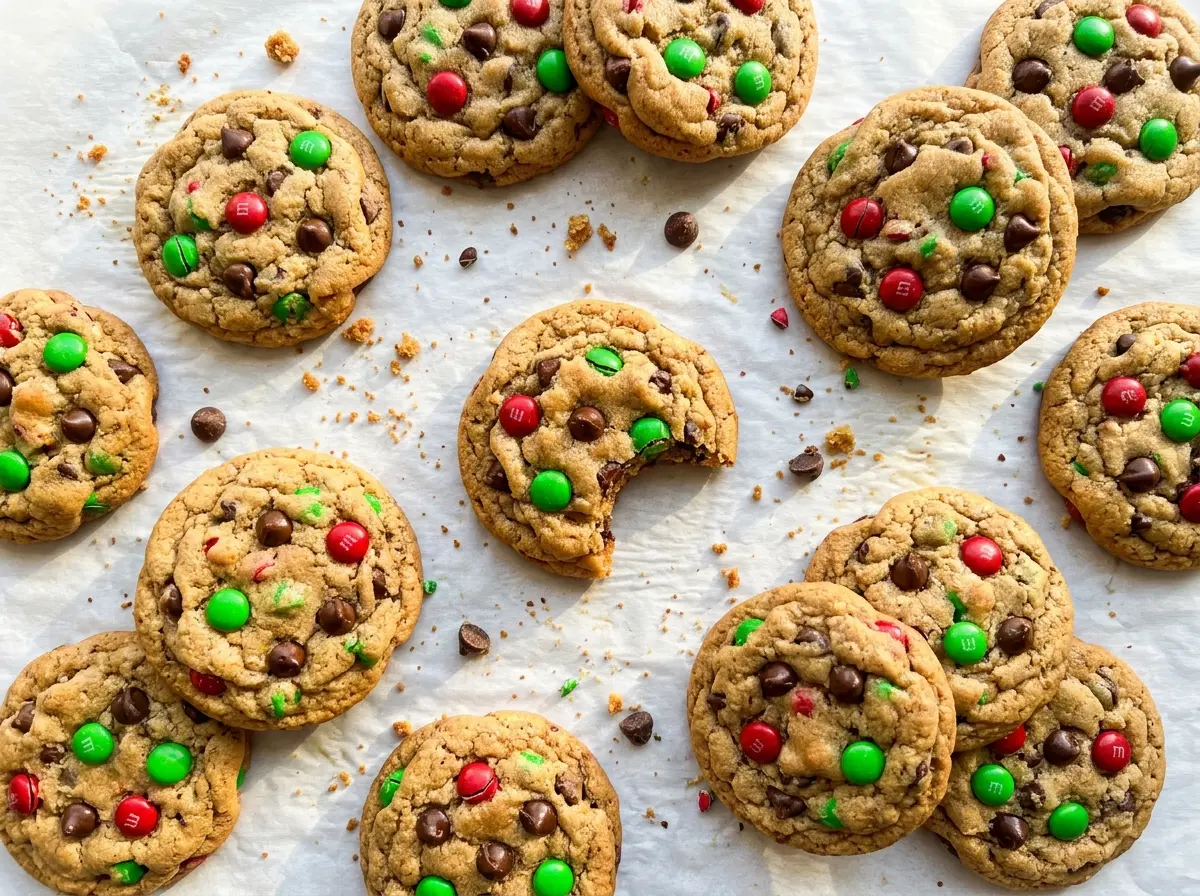
At 10 minutes, the edges are turning golden while the centers still look a little soft. That’s the moment to pull these Christmas Chocolate Chip Cookies from the oven, not a sign they need more time. They’ll finish setting on the baking sheet, with chocolate chips tucked between bright red and green candy-coated chocolates.
I chill the dough before baking because butter that’s been softened and creamed can make cookies spread quickly in a hot oven. Thirty minutes in the refrigerator firms the dough back up, so the cookies hold their shape and bake with tender centers. Fold the mix-ins in by hand at the end, and you’ll get chocolate and colorful candies throughout each bite without working the dough more than it needs.
Kitchen Note
The centers should still look slightly soft when the cookies come out. Leave them on the hot baking sheet for 5 minutes; moving them sooner can leave the warm cookies too fragile to handle.
Save these Christmas Chocolate Chip Cookies for a batch with golden edges, soft centers, and red-and-green candy in every cookie.
Why This Dough Needs 30 Minutes in the Refrigerator
Butter that’s softened enough to cream easily is also warm enough to soften further while you mix. If that dough goes straight into the oven, the butter melts quickly and the cookies can spread before their edges have time to set. Chilling the covered dough for 30 minutes firms the butter back up, giving each portion a better chance to bake into a cookie instead of a thin, wide puddle.
The flour benefits from the pause, too: it has time to absorb some of the moisture in the dough, making the mixture easier to scoop. You’re not looking for a hard, overnight-firm dough here. After half an hour, it should feel cool and more manageable but still scoop without a struggle. This short rest is especially helpful when you’re baking a full batch of 30 cookies, because the portions stay more consistent from the first sheet to the last.
What Each Chocolate and Candy Brings to These Cookies

- All-purpose flour — It gives the cookies their structure. Spoon it into the measuring cup and level it rather than packing it down; too much flour can make the dough stiff and the baked cookies dry. A standard all-purpose flour works well here.
- Unsalted butter — Butter adds richness and helps create the tender, crisp-edged texture. Use it softened, not melted, so it can cream with the sugars. Unsalted butter also lets you control the salt in the dough; if you buy a store brand, that’s fine.
- Brown and granulated sugars — The brown sugar brings a deeper, slightly caramel-like note, while granulated sugar contributes sweetness and helps the edges brown. Pack the brown sugar into its measuring cup. There isn’t a close one-for-one swap that keeps the same balance of flavor and texture.
- Room-temperature eggs and vanilla — Eggs at room temperature blend more smoothly into the creamed butter and sugar, and vanilla rounds out the chocolate. If you forget to set the eggs out, place them in a bowl of warm tap water for a few minutes before cracking them.
- Semisweet chocolate chips and candy-coated chocolates — Semisweet chips keep the cookies from tasting overly sweet, while the red and green candies bring color and a crisp shell. Choose fresh chips that still look glossy and intact; there’s no need for a premium brand. Fold both in gently so they’re spread through the dough without crushing the candy shells.
From Creamed Butter to Cookies With Golden Edges
Cream the Butter and Sugars Until Fluffy
Beat the softened butter with both sugars in a large bowl using an electric mixer on medium speed for 2 to 3 minutes. The mixture should look lighter in color and fluffy, with no large streaks of butter around the bowl. If the butter is cold, it won’t blend evenly; if it’s melted, the mixture won’t build the same airy texture. Stop once it’s light and cohesive rather than beating on indefinitely.
Add the Eggs, Then the Dry Ingredients
Beat in the eggs one at a time, letting each blend into the butter mixture before adding the next, then mix in the vanilla. Whisk the flour, baking soda, and salt together in a medium bowl so the leavener and salt are distributed before they reach the dough. Add that mixture gradually on low speed, stopping as soon as the flour disappears. Mixing past that point can make the cookies tougher.
Fold in the Mix-Ins and Chill
Use a spatula to fold the semisweet chocolate chips and candy-coated chocolates through the dough. Scrape along the bottom and sides of the bowl so you don’t leave plain pockets of dough behind. Cover the bowl and refrigerate the dough for 30 minutes. It should be cool and firm enough to scoop while remaining soft enough to portion easily.
Scoop, Bake, and Let the Edges Set
Heat the oven to 350°F and line two large baking sheets with parchment paper. Scoop the dough into 1 1/2-tablespoon portions, spacing them about 2 inches apart, and bake one sheet at a time for 10 to 12 minutes. Look for golden edges with centers that still appear slightly soft; waiting for the centers to look fully firm can leave the cookies overbaked. Cool them on the baking sheets for 5 minutes, then transfer them to a wire rack to cool completely.
Easy Ways to Change Up the Chocolate or Make Them Dairy-Free
Make the Cookies Darker and Less Sweet
Replace the semisweet chocolate chips with dark chocolate chips. The cookies will have a deeper chocolate flavor and a little less sweetness, while the red and green candies keep their familiar color and crunch.
Give the Mix-Ins a Peanut Butter Twist
Swap the semisweet chocolate chips for peanut butter chips and keep the candy-coated chocolates. You’ll get a sweet peanut-butter note instead of the sharper contrast from semisweet chocolate; fold them into the dough at the same point.
Make a Dairy-Free Batch
Use dairy-free plant butter sticks in place of the butter and dairy-free semisweet chocolate chips. Choose dairy-free candy-coated chocolates, or replace those with more dairy-free chips if you can’t find them. Stick-style plant butter works better than a soft tub spread, though the cookies may bake up a little less buttery.
Storage and Reheating
- Refrigerator: Keep the cookies in an airtight container for up to 1 week. They’ll become firmer and lose some of their tender texture, so room-temperature storage is a better choice if you’ll eat them within a few days.
- Freezer: Freeze completely cooled cookies in an airtight freezer container for up to 2 months. Thaw them at room temperature before serving.
- Reheating: Warm cookies in a 300°F oven for 3 to 5 minutes. Avoid leaving them in too long, since the edges can dry out before the centers warm through.
Questions That Come Up When Baking These Cookies
Christmas Chocolate Chip Cookies
Ingredients
Equipment
Method
- Whisk the flour, baking soda, and salt together in a medium bowl.
- Beat the softened butter, brown sugar, and granulated sugar in a large bowl with an electric mixer on medium speed for 2 to 3 minutes, until light and fluffy.
- Beat in the eggs one at a time.
- Mix in the vanilla extract.
- Gradually mix in the flour mixture on low speed just until combined.
- Fold in the chocolate chips and candy-coated chocolates.
- Cover the dough and refrigerate for 30 minutes.
- Heat the oven to 350°F.
- Line two large baking sheets with parchment paper.
- Scoop the dough into 1 1/2-tablespoon portions onto the prepared baking sheets, spacing them about 2 inches apart.
- Bake one sheet at a time for 10 to 12 minutes, until the edges are golden and the centers still look slightly soft.
- Cool the cookies on the baking sheets for 5 minutes.
- Transfer the cookies to a wire rack to cool completely.