The moment the cocoa hits the wet mixture, the batter turns dark and thick, and it’s easy to keep stirring until every lump is gone. Resist that urge. When I make this chocolate peppermint bread, I stop as soon as the dry streaks disappear, then fold in the chips; that’s how the slices stay tender instead of heavy.
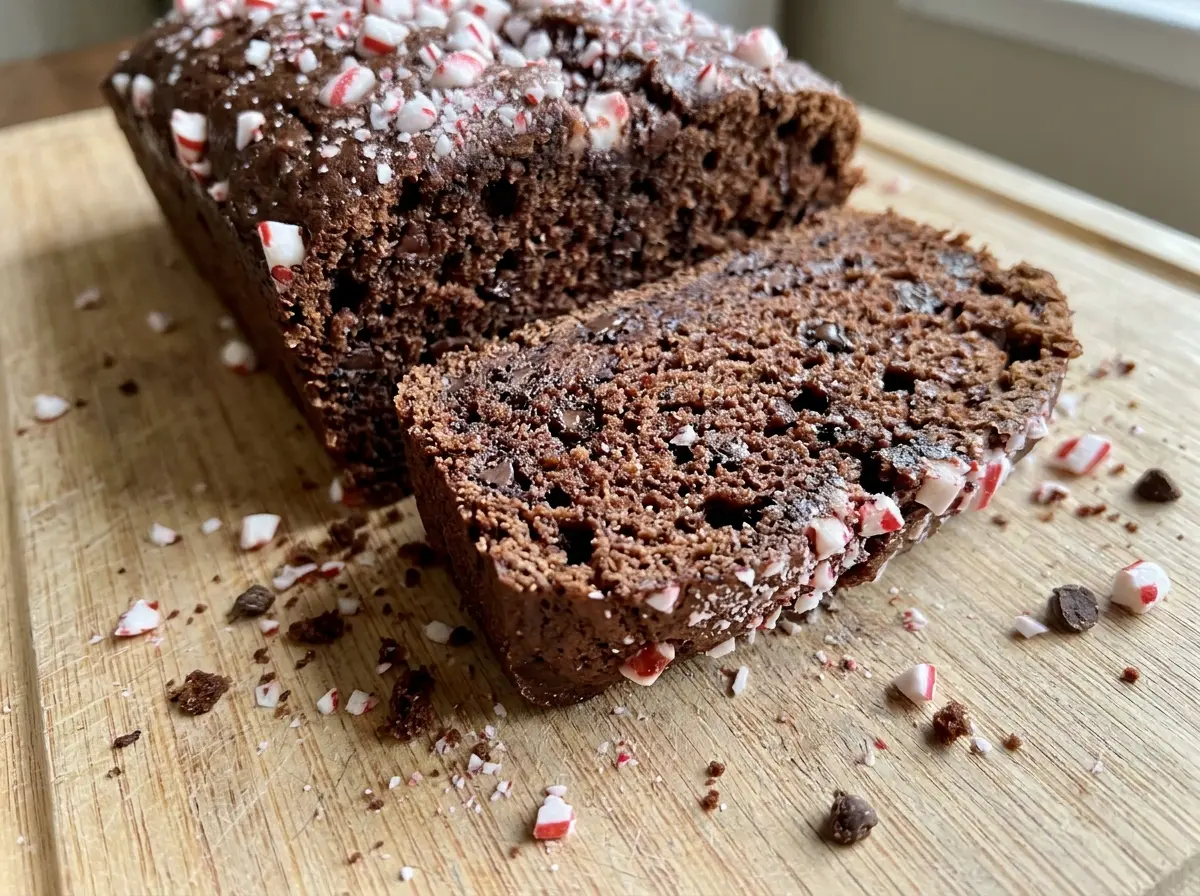
Peppermint can take over a chocolate bake quickly, so I measure the extract carefully and let the cocoa and semisweet chips carry the chocolate flavor. Buttermilk adds a gentle tang and helps the loaf bake up soft, while vegetable oil keeps the crumb moist without needing softened butter. Once cooled, each slice has a deep cocoa center with little pockets of melted chocolate and a clean peppermint finish.
Kitchen Note
A toothpick can give a false reading if it lands in a chocolate chip. Test the center in a spot away from the chips, and look for a few moist crumbs rather than waiting for the toothpick to come out completely clean.
Save this chocolate peppermint bread for a cocoa-rich loaf with a cool mint finish and semisweet chocolate chips in every slice.
Why This Chocolate Loaf Gets Dense When You Keep Stirring
Cocoa-heavy batter doesn’t look as smooth or loose as a plain vanilla quick-bread batter, and that’s where overmixing often starts. Once flour meets the wet ingredients, stirring develops gluten. A little mixing brings the batter together; prolonged mixing can leave the loaf tight and rubbery instead of soft.
Whisk the dry ingredients together first so the cocoa and leaveners are spread through the flour before they meet the wet mixture. Then add the dry bowl to the wet bowl and stir just until you can’t see dry flour. The batter may still look thick, and the chips won’t distribute perfectly evenly until you fold them through. That’s fine. A few turns with a spatula are better than an extra minute of vigorous stirring.
The baking powder and baking soda both have a job in this loaf. Keep them evenly mixed into the dry ingredients, and avoid letting the combined batter sit around while the oven heats; get the pan ready first so it can go into the oven once the chips are folded in.
Cocoa, Buttermilk, and Peppermint: What Shapes the Crumb
- Unsweetened cocoa powder — This supplies the loaf’s chocolate base without adding extra sugar. Use the unsweetened cocoa sold for baking, not sweetened hot cocoa mix; the latter changes both sweetness and the balance of dry ingredients. A standard grocery-store cocoa works well here.
- Buttermilk — Its acidity works alongside the baking soda, and its thickness gives the batter more body than plain milk. Fresh buttermilk is a good choice, but the carton doesn’t need to be a specialty brand. If you’re out, the FAQ explains a practical substitute.
- Peppermint extract — A measured extract gives the chocolate a clear mint note without bringing extra liquid into the batter. Peppermint oil is much more concentrated and isn’t a direct swap. Check the bottle label so you’re using peppermint extract, not a different mint flavor.
- Vegetable oil — A neutral oil keeps the crumb moist and lets the cocoa and peppermint stay in front. There’s no need to use an expensive bottle; a mild, standard vegetable oil is the right fit.
- Semisweet chocolate chips — The chips add concentrated pockets of chocolate and hold their shape better than finely grated chocolate. Choose a brand you enjoy eating, but a basic baking chip works just as well as a pricier one.
- All-purpose flour and eggs — Flour provides the structure, while the eggs help bind the batter. Measure the flour without packing it into the cup; a heavy scoop is one easy way to push a quick bread toward a dry, dense texture.
The Mixing Cues That Keep Chocolate Peppermint Bread Tender
Whisk the Cocoa Into the Dry Ingredients
Heat the oven to 350°F and coat a 9×5-inch loaf pan with nonstick cooking spray before mixing the batter. In a medium bowl, whisk the flour, cocoa powder, baking powder, baking soda, and salt until the cocoa looks evenly distributed. Break up any cocoa clumps as you whisk rather than trying to work them out after the wet ingredients are added. An even, uniformly brown mixture is ready for the wet bowl.
Bring the Wet Mixture Together
In a large bowl, whisk the sugar, eggs, buttermilk, vegetable oil, and peppermint extract until smooth. The mixture should look cohesive, with no streaks of egg white or oil sitting on top. Whisking this bowl before adding flour lets the sugar disperse and the peppermint spread through the batter. Don’t add the dry mixture until the oven and pan are ready.
Fold Until the Flour Disappears
Add the dry ingredients to the wet ingredients and stir just until no dry streaks remain. The batter will be thick and dark, so scrape along the bottom of the bowl where dry flour can hide. Fold in the semisweet chocolate chips with a few deliberate turns rather than beating them through. Stop once the chips are spread through the batter.
Bake, Then Let the Loaf Set
Scrape the batter into the prepared pan and bake for 50 to 60 minutes. The top should look set, and a toothpick inserted in the center away from a chocolate chip should come out with a few moist crumbs. If it comes out coated in wet batter, give the loaf more oven time and check again. Cool it in the pan for 10 minutes, turn it out onto a wire rack, and wait until it’s completely cool before slicing.
Three Adjustments for a Different Chocolate Peppermint Loaf
Leave Out the Peppermint for a Straight Chocolate Loaf
Omit the peppermint extract and keep everything else the same for a chocolate chip loaf with no mint finish. The cocoa and semisweet chips still bring plenty of chocolate flavor, but the result tastes more familiar and less seasonal.
Use Dark Chocolate Chips for a Less-Sweet Bite
Replace the semisweet chips with the same amount of dark chocolate chips. The loaf keeps its pockets of chocolate, but the sharper, more bitter notes make the peppermint stand out a little more.
Make It Gluten-Free With a 1:1 Baking Blend
Replace the all-purpose flour with the same amount of a cup-for-cup gluten-free baking blend designed to replace wheat flour. Choose one that includes xanthan gum or another binder. The crumb may be a touch more delicate, so let the loaf cool completely before slicing.
Storage and Reheating
- Refrigerator: Store the completely cooled loaf in an airtight container for up to 4 days. Refrigeration can make the crumb feel firmer, so let a slice come to room temperature before eating.
- Freezer: Freeze individual slices wrapped well and placed in a freezer-safe container for up to 2 months. Thaw a slice at room temperature while still wrapped to help it retain moisture.
- Reheating: Warm a room-temperature slice in the microwave for about 10 seconds, then add a few seconds if needed. Longer heating can dry the crumb and make the chocolate chips overly hot.
Questions That Come Up With Chocolate Peppermint Bread
Chocolate Peppermint Bread
Ingredients
Equipment
Method
- Heat the oven to 350°F.
- Coat a 9x5-inch loaf pan with nonstick cooking spray.
- In a medium bowl, whisk together the flour, cocoa powder, baking powder, baking soda, and salt.
- In a large bowl, whisk the sugar, eggs, buttermilk, oil, and peppermint extract until smooth.
- Add the dry ingredients to the wet ingredients and stir just until no dry streaks remain.
- Fold in the chocolate chips.
- Scrape the batter into the prepared pan.
- Bake for 50 to 60 minutes, until a toothpick inserted in the center away from a chocolate chip comes out with a few moist crumbs.
- Cool the bread in the pan for 10 minutes.
- Turn it out onto a wire rack.
- Cool completely before slicing.