When the edges look set but the toothpick still comes out with a few moist crumbs, that’s the moment to pull these brownies from the oven. Wait for a completely clean toothpick and the centers will keep baking in the pan, leaving you with a drier square. I look for that little bit of chocolate on the tester, then let the brownies cool before adding the topping.
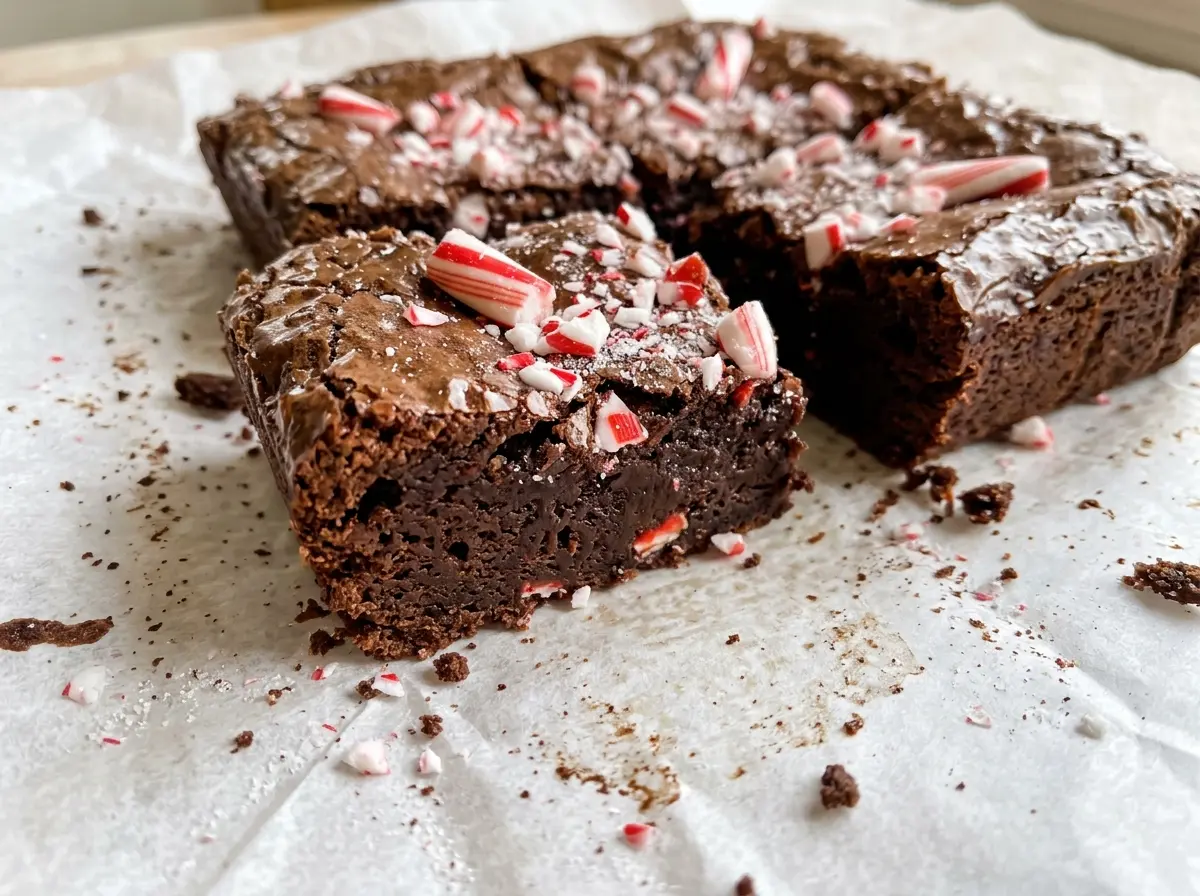
The batter comes together in one bowl, starting with melted butter and sugar. Whisking in the eggs one at a time helps the mixture come together smoothly, and stirring the flour and cocoa in only until the dry streaks disappear keeps the brownies tender. A thin layer of semisweet chocolate ganache and crushed candy canes gives each square a cool peppermint finish without hiding the brownie underneath.
Kitchen Note
Sprinkle the crushed candy canes over the ganache while it’s still soft. Once the topping sets, the pieces stay put instead of rolling off as you portion the brownies.
Save these Candy Cane Brownies for a chocolate-and-peppermint treat with a smooth ganache topping and a crisp candy cane finish.
Why the Toothpick Shouldn’t Come Out Clean in These Brownies
Brownies keep cooking from the heat held in the pan, so a tester that comes out completely clean is a sign that the center has gone past fudgy. For this batch, look for edges that have set and a toothpick inserted near the center that carries a few moist crumbs. The center can look a little soft when the pan comes out; it firms as the brownies cool.
There’s a useful difference between moist crumbs and wet batter. If the tester is streaked with loose, shiny batter, give the pan more time and check again. If it comes out clean, take the brownies out rather than leaving them in the oven for extra insurance. That narrow window gives you a set edge and a dense, tender middle beneath the chocolate topping.
The pan size matters here, too. An 8-inch square pan gives the batter enough depth for that contrast between edge and center. A wider pan spreads the same batter thinner, so the bake won’t behave the same way at the stated time.
What Makes the Brownie Base and Peppermint Topping Work Together

- Unsalted butter and granulated sugar — Melted butter makes a compact, fudgy base rather than a fluffy, creamed cake batter. The sugar dissolves into the warm butter when stirred, so ordinary granulated sugar works well; unsalted butter also lets you control the salt in the finished brownies.
- Eggs — They bind the batter and give the brownies structure. Use large eggs, and whisk them in one at a time so they blend into the melted butter mixture instead of leaving slippery streaks.
- All-purpose flour and unsweetened cocoa powder — Flour holds the squares together, while cocoa brings the chocolate flavor without adding melted chocolate to the base. Sifting isn’t required, but break up any cocoa lumps before mixing so they don’t leave dry pockets in the batter.
- Vanilla and peppermint extracts — Vanilla rounds out the cocoa, and peppermint extract gives the brownies their mint note. Peppermint extract is concentrated, so measure it carefully rather than pouring by eye.
- Semisweet chocolate and heavy cream — Finely chopped chocolate melts more evenly when the hot cream is poured over it. A baking bar is a dependable choice for a smooth ganache; the cream’s richness gives the topping a soft, spreadable texture once stirred.
- Crushed candy canes — They add the crisp peppermint finish and a little color against the dark chocolate. Crush them into small pieces rather than powder so each square gets a clear candy crunch.
From One-Bowl Batter to a Set Peppermint Ganache
Stir the Melted Butter and Sugar
Heat the oven to 350°F and line an 8-inch square pan with parchment, leaving an overhang on two sides. Melt the butter in a medium microwave-safe bowl, then stir in the granulated sugar until combined. Whisk in the eggs one at a time, followed by the vanilla and peppermint extracts. The mixture should look cohesive before the dry ingredients go in.
Mix Just Until the Cocoa Disappears
Add the flour, cocoa powder, and kosher salt to the bowl. Stir only until no dry streaks remain; a few extra turns after the flour disappears can make the brownies tougher. Scrape the batter into the prepared pan and spread it evenly into the corners. An even layer helps the edges and center bake at a more predictable pace.
Bake to Moist Crumbs, Then Cool
Bake for 22 to 27 minutes, checking near the center for a toothpick with a few moist crumbs while the edges look set. If you see wet batter, return the pan to the oven and check again; don’t wait for the toothpick to come out spotless. Cool the brownies completely in the pan, about 1 hour. The ganache goes on only after the base is cool, so it stays in a neat layer instead of melting into the brownies.
Make the Ganache and Finish the Squares
Put the finely chopped semisweet chocolate in a heatproof bowl. Microwave the heavy cream for 30 to 45 seconds, until steaming, pour it over the chocolate, and let it stand for 3 minutes. Stir until smooth, spread the ganache over the cooled brownies, then scatter the crushed candy canes on top. Refrigerate for 30 to 40 minutes, until the topping is set, then use the parchment overhang to lift the brownies out and cut them into 16 squares.
Three Changes That Give These Brownies a Different Finish
Make Them Gluten-Free
Replace the all-purpose flour with the same amount of a cup-for-cup gluten-free baking flour blend. Choose a blend intended to replace wheat flour in baking; the brownies should keep their dense texture, though the exact crumb depends on the blend.
Use Bittersweet Chocolate for a Less-Sweet Top
Swap the semisweet chocolate for the same amount of bittersweet chocolate. The ganache will taste darker and less sweet against the candy canes, while keeping the same smooth, spreadable style of topping.
Dial Back the Mint in the Brownie
Leave the peppermint extract out of the batter and keep the candy cane topping. You’ll still get peppermint from the garnish, but the chocolate base will taste less minty and let the cocoa come through more clearly.
Storage and Reheating
- Refrigerator: Store covered in an airtight container for up to 4 days. The candy cane pieces may soften as they sit against the topping.
- Freezer: Freeze the cut squares in a single layer until firm, then wrap them well and freeze for up to 2 months. Thaw in the refrigerator; the candy topping may be less crisp afterward.
- Reheating: These are best served chilled or brought briefly toward room temperature for a softer bite. Don’t microwave them; the ganache will melt before the brownie warms evenly.
Questions That Come Up While Making Candy Cane Brownies
Candy Cane Brownies
Ingredients
Equipment
Method
- Heat the oven to 350°F.
- Line an 8-inch square baking pan with parchment paper, leaving an overhang on two sides.
- Melt the butter in a medium microwave-safe bowl.
- Stir in the sugar until combined.
- Whisk in the eggs one at a time.
- Stir in the vanilla and peppermint extracts.
- Add the flour, cocoa powder, and salt, and stir just until no dry streaks remain.
- Spread the batter evenly in the prepared pan.
- Bake for 22 to 27 minutes, until the edges are set and a toothpick inserted near the center comes out with a few moist crumbs.
- Cool completely in the pan, about 1 hour.
- Put the chopped chocolate in a heatproof bowl.
- Microwave the heavy cream until steaming, about 30 to 45 seconds.
- Pour the cream over the chocolate and let stand for 3 minutes.
- Stir the chocolate mixture until smooth.
- Spread it over the cooled brownies.
- Sprinkle with the crushed candy canes.
- Refrigerate for 30 to 40 minutes, until the topping is set.
- Lift the brownies from the pan using the parchment and cut into 16 squares.