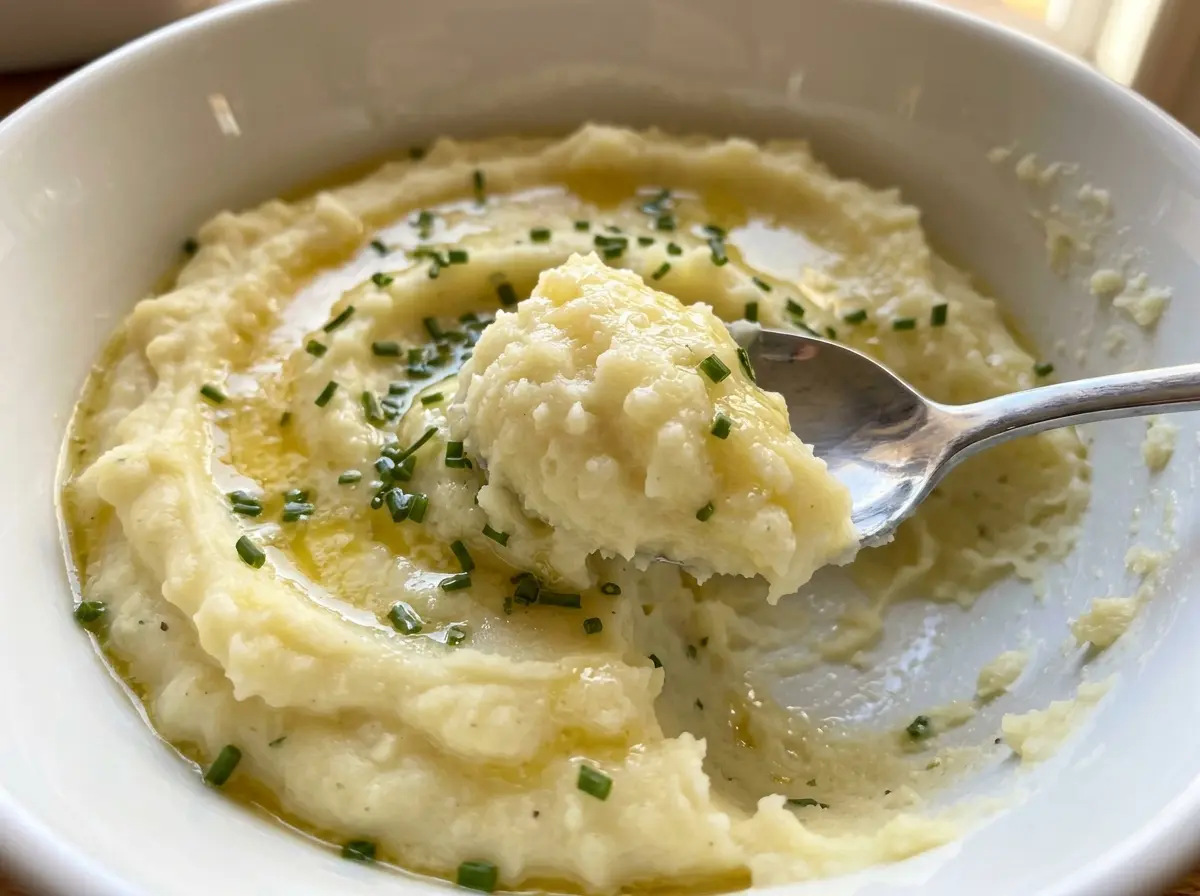
The first pan of mashed potatoes I chilled looked perfect going into the refrigerator, but the cold center took longer to warm than I expected. Baking the potatoes in the same dish I plan to serve solves that problem and keeps the make-ahead work simple. These make ahead mashed potatoes start with Yukon Golds, then get mashed with warm milk, butter, cream cheese, and sour cream for a creamy texture that holds up after chilling.
I keep the potatoes in pieces about the same size so they cook evenly, and I mash them by hand rather than beating them until they’re elastic. The butter dotted over the top gives the casserole a rich finish as it bakes. It’s a generous pan, enough for 10 servings, with a smooth middle and a soft, buttery top.
Kitchen Note
Drain the potatoes thoroughly before they go back into the pot. Water left clinging to them can loosen the mash and mute the creamy dairy flavors.
Save these make ahead mashed potatoes for a creamy, buttery casserole you can prep before serving day.
Why Chilling Mashed Potatoes Changes the Bake
A bowl of freshly mashed potatoes and a chilled casserole don’t heat the same way. Once the potatoes are packed into a baking dish and refrigerated, the center becomes one dense, cold mass. A quick pass through the oven won’t warm it evenly, which is why this dish needs a covered bake before the top is uncovered. The covered dish warms through without letting the surface dry out too early.
The dairy mixture matters here, too. Cream cheese and sour cream give the mash a rich, cohesive texture that stays pleasant after chilling, while warm milk blends in without cooling the potatoes as you mash. I keep the potatoes creamy rather than stiff before they go into the dish; a dry mash can feel heavier after baking. Think of the casserole as a planned second cook, not just a bowl of leftovers that happens to be reheated.
What Gives This Mash Its Creamy, Make-Ahead Texture

- Yukon Gold potatoes — Their naturally creamy flesh makes a smooth mash without needing aggressive beating. Choose firm potatoes without soft spots, and cut them into even pieces so they finish cooking together. I keep Yukon Golds for this version; a starchier potato changes the texture.
- Whole milk — It adds moisture and richness without making the potatoes taste watery. Warming it first helps it blend into the mash smoothly. I use whole milk here rather than swapping in a thinner milk, which would make the finished potatoes less rich.
- Cream cheese and sour cream — Cream cheese gives the mash body, while sour cream brings a gentle tang that balances the butter. A block of cream cheese is the right texture for this mixture; soften it and cut it into pieces so it mashes in without leaving cold lumps. These dairy ingredients are doing distinct jobs, so there isn’t a direct swap that keeps the same result.
- Unsalted butter — Butter enriches the potatoes from within and adds a glossy finish on top. Softened butter blends into the mash more evenly than a cold piece, and unsalted butter lets the kosher salt season the potatoes without adding hidden saltiness.
From Tender Potatoes to a Hot, Creamy Center
Simmer Until a Fork Slides In Easily
Put the peeled, 1-inch potato pieces in a 10-quart pot with 4 quarts of cold water. Bring the water to a boil over high heat, then reduce the heat and simmer for 15–20 minutes. The potatoes are ready when a fork pierces them very easily; a firm center will leave lumps in the finished mash. While they cook, warm the milk in a small saucepan over medium-low heat until it’s steaming but not boiling.
Mash by Hand While Everything Is Warm
Drain the potatoes well and return them to the pot. Add 6 tablespoons of the softened butter along with the cream cheese, sour cream, warm milk, kosher salt, and black pepper. Mash by hand until creamy, stopping once the pieces are worked in and the texture looks smooth. Beating the potatoes hard for too long can make them gluey, so use a steady hand rather than trying to whip them fluffy.
Build the Casserole in Its Serving Dish
Coat a 9×13-inch baking dish with nonstick cooking spray, then transfer the mash into it. Smooth the surface so it heats evenly, and dot the top with the remaining 2 tablespoons of butter. A level top makes it easier to judge the finish after baking. Let the casserole cool before covering it tightly and chilling it.
Bake Covered First, Then Uncover the Top
When it’s time to serve, heat the oven to 350°F and bake the potatoes cold and covered for 50–60 minutes. Uncover the dish for the last 10 minutes so the surface can finish while the middle continues to heat. Check the center with an instant-read thermometer; it should reach 165°F. If the center hasn’t reached that temperature, keep baking until it does.
Two Small Changes That Shift the Flavor
A Lower-Sodium Pan
For a lower-sodium version, leave out the kosher salt and keep the black pepper. The potatoes will taste less seasoned, but the butter and tangy dairy still give them plenty of richness. This changes the seasoning, not the make-ahead method.
Butter Folded In, Not Dotted on Top
Keep the full amount of butter, but mash it all into the potatoes instead of saving some for the surface. The result is an evenly buttery mash without the distinct buttered top. The casserole still bakes in the same dish.
Storage and Reheating
- Refrigerator: Cool uncovered for 20–30 minutes, cover tightly, and refrigerate within 2 hours of cooking. The potatoes keep for up to 2 days; the chilled mash will be firm before it goes into the oven.
- Freezer: I keep this batch refrigerated rather than freezing it. The tested make-ahead window is up to 2 days, and freezing may change the creamy texture.
- Reheating: Bake the cold, covered dish at 350°F for 50–60 minutes, uncovering it for the final 10 minutes, until the center reaches 165°F. Don’t uncover it at the start; the top can dry before the middle is hot.
Questions That Come Up With Make-Ahead Mashed Potatoes
Make Ahead Mashed Potatoes
Ingredients
Equipment
Method
- Put the potatoes in a 10-quart pot and add the cold water. Bring to a boil over high heat, then reduce the heat and simmer for 15–20 minutes, until the potatoes are very tender when pierced with a fork.
- While the potatoes cook, warm the milk in a small saucepan over medium-low heat until steaming but not boiling.
- Drain the potatoes well and return them to the pot. Mash by hand with 6 tablespoons of the butter, the cream cheese, sour cream, warm milk, salt, and pepper until creamy.
- Coat a 9x13-inch baking dish with nonstick cooking spray and transfer the potatoes to it. Smooth the top and dot with the remaining 2 tablespoons butter.
- Let the potatoes cool uncovered for 20–30 minutes.
- Cover tightly and refrigerate within 2 hours of cooking for up to 2 days.
- When ready to serve, heat the oven to 350°F.
- Bake the cold, covered potatoes for 50–60 minutes, uncovering for the last 10 minutes, until the center reaches 165°F.