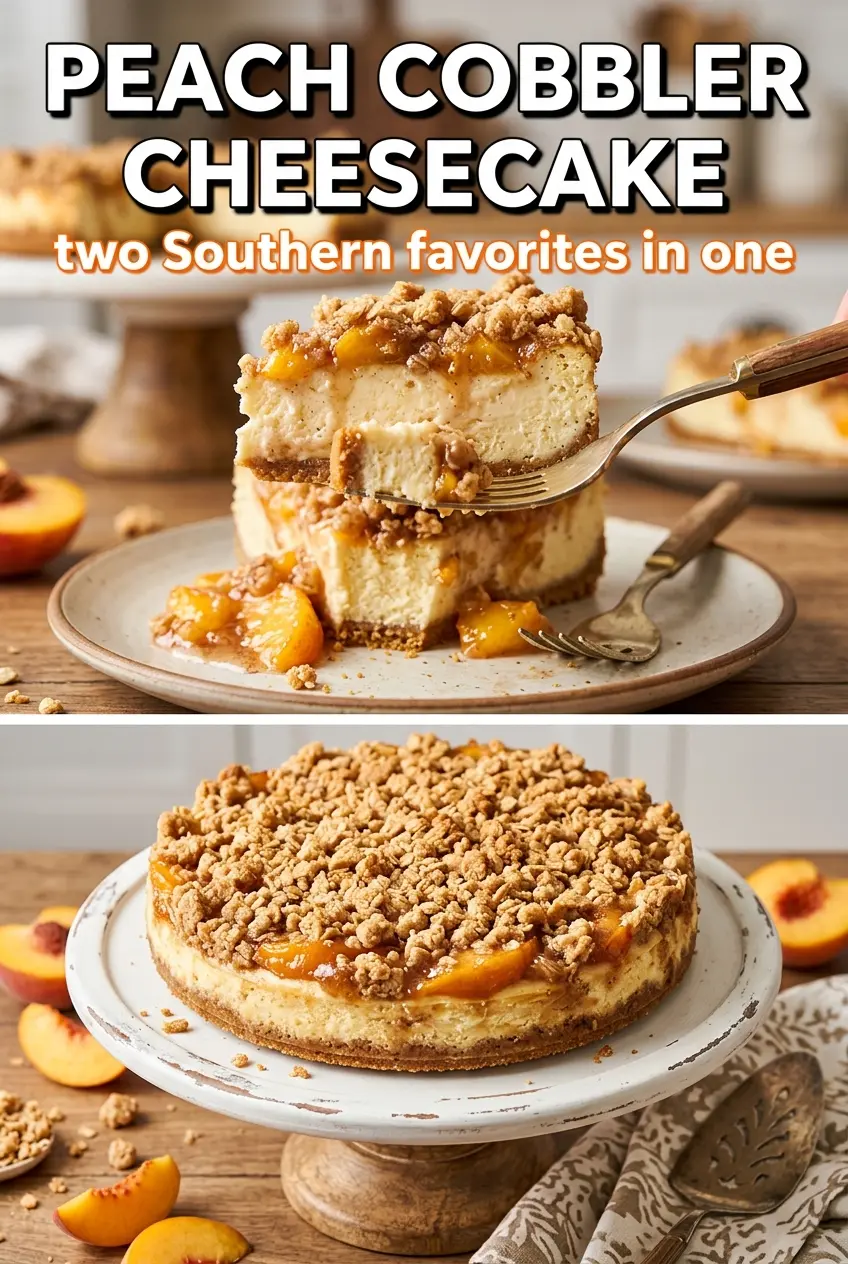
Peach Cobbler Cheesecake lands in that rare dessert sweet spot where the first bite gives you cool, creamy cheesecake, then warm cinnamon peaches, then a buttery crumb top that crackles just a little under the fork. It eats like two classic Southern desserts that decided to share a pan, and the contrast is what keeps people going back for a second slice before the first one is gone.
The crust needs to be packed firmly so it slices cleanly under the filling, and the cheesecake layer stays smooth when the cream cheese is fully softened before mixing. The peaches do the heavy lifting for the cobbler side, but a light toss with brown sugar and cinnamon keeps them juicy instead of watery and gives the topping something fragrant to work with. Bake it until the center still has a small wobble; that little jiggle is what keeps the texture creamy after chilling.
Below, I’m walking through the parts that matter most: how to keep the cheesecake from baking up grainy, how to get the crumb topping sandy instead of paste-like, and what to do if you’re using canned peaches. There’s also a storage note for making it ahead, which is handy because this dessert gets even better after a long chill.
The cheesecake layer stayed silky and the peach topping didn’t run all over the pan. I chilled it overnight, and the slices came out neat with that crumb topping still holding some texture.
Save this Peach Cobbler Cheesecake for the dessert table when you want creamy cheesecake, buttery crumble, and juicy peaches in one slice.
The Secret to Keeping the Cheesecake Layer Smooth Under Juicy Peaches
The biggest risk in a dessert like this is texture clash. If the filling is under-mixed, it bakes with little lumps. If it’s over-mixed after the eggs go in, it can puff, crack, and bake up denser than you want. The goal is a smooth batter that stays calm in the oven.
The peaches also matter more than they look at first glance. Fresh peaches bring bright flavor, but canned peaches can work when they’re drained well. If the fruit is too wet, the topping sinks and the cheesecake layer can get loose around the edges. A light toss with brown sugar and cinnamon gives the fruit a little glaze and keeps the cobbler layer from tasting flat.
What Each Ingredient Is Actually Doing in This Peach Cobbler Cheesecake

- Graham cracker crumbs — These give you a sturdy, sweet base that holds up under the cheesecake layer. Crush them fine so the crust presses together without crumbling when you cut the first slice.
- Cream cheese — This is the backbone of the filling, and it needs to be fully softened before mixing. Cold cream cheese leaves little bits behind that won’t smooth out later, no matter how long you beat it.
- Granulated sugar — It sweetens the cheesecake without adding moisture. Don’t cut it too much, or the filling tastes flat against the peaches and crumble.
- Eggs — They set the cheesecake so it slices cleanly after chilling. Add them one at a time and stop mixing as soon as they disappear into the batter.
- Peaches — Fresh peaches give the cleanest fruit flavor, but canned peaches are fine if you drain them well first. Too much extra juice is the fastest way to a soggy topping.
- Brown sugar and cinnamon — These turn the peaches into a cobbler-style layer instead of plain fruit on top of cheesecake. The brown sugar also helps draw out a little juice, which becomes part of the sauce as it bakes.
- Cold butter for the topping — The butter needs to stay cold so the topping bakes into crumbs instead of a paste. Cut it in until the mixture looks like coarse sand with a few pea-sized pieces left behind.
Building the Layers Without Letting Them Bleed Together
Pressing the crust first
Mix the graham crumbs with melted butter until every crumb looks damp, then press them into the pan with real pressure. A loose crust falls apart when you slice it, especially once the cheesecake has chilled and firmed up. The bottom should look even and compact, not sandy.
Whipping the filling just enough
Beat the cream cheese and sugar until the mixture looks smooth and glossy, then add the eggs one at a time. Once the eggs go in, stop as soon as the batter is combined. Too much air in the filling is what leads to cracks and a puffy top that settles unevenly.
Layering the peaches and crumb topping
Spoon the peaches evenly over the cheesecake batter so the fruit sits in a rough single layer instead of sinking in one corner. Then scatter the crumb topping over the fruit without packing it down. If you press it, you’ll lose the dry, crisp pockets that make the topping taste like cobbler instead of a soft streusel.
Knowing when the bake is done
The edges should look set and the center should still have a small jiggle when you gently nudge the pan. That wobble is important. If you wait for the middle to look completely firm, the cheesecake will overbake and turn dry once it chills.
Three Ways to Adapt This Dessert Without Losing the Point
Use canned peaches when fresh ones aren’t great
Drain the peaches well and pat them dry before adding the cinnamon and brown sugar. Canned peaches are softer and sweeter than fresh, so they bake into a silkier fruit layer and release less texture, but they still give you the same cobbler effect.
Make it gluten-free with one swap
Use gluten-free graham-style crumbs for the crust and a 1:1 gluten-free flour blend for the topping. The cheesecake itself is already gluten-free, so this swap keeps the texture close to the original without changing the flavor much.
Make the topping more like a true cobbler crust
Leave a few bigger pieces of butter in the flour mixture so the topping bakes with crisp pockets instead of one uniform crumb. That gives you a more rustic finish and a little extra crunch on top, which plays well against the creamy filling.
Storage and Reheating
- Refrigerator: Store covered for up to 4 days. The crumb topping softens a bit, but the cheesecake firms up and slices even cleaner after a day.
- Freezer: It freezes well in slices. Wrap each slice tightly, then store in an airtight container for up to 2 months. Thaw overnight in the refrigerator.
- Reheating: This dessert is best served cold or lightly chilled, not heated. If you want to soften a slice slightly, leave it at room temperature for 15 to 20 minutes instead of microwaving it, which can make the filling grainy and the topping soggy.
Answers to the Questions Worth Asking
Peach Cobbler Cheesecake
Ingredients
Equipment
Method
- Preheat the oven to 325°F and line a 9-inch springform pan with parchment paper. Mix the graham cracker crumbs with melted butter, then press firmly into the bottom of the pan.
- Beat the cream cheese and granulated sugar until smooth. Beat in the eggs one at a time, then add the vanilla extract and mix until fully combined, scraping the bowl as needed.
- Pour the cheesecake batter over the crust. Keep the layer even so the topping distributes more uniformly.
- Toss the peaches with the packed brown sugar and ground cinnamon. Spoon the peaches evenly over the cheesecake batter.
- Combine the all-purpose flour and the 1/3 cup packed brown sugar for the topping. Cut in the cold cubed butter until coarse crumbs form, then sprinkle over the peaches.
- Bake for 55–60 minutes at 325°F, until the center is just set with a slight jiggle. The edges should look set while the middle still trembles when the pan is gently shaken.
- Cool the cheesecake completely at room temperature. This prevents the top from cracking and helps the texture set evenly.
- Chill for at least 4 hours before releasing the springform and slicing. The surface should feel firm and the cheesecake should cut cleanly.