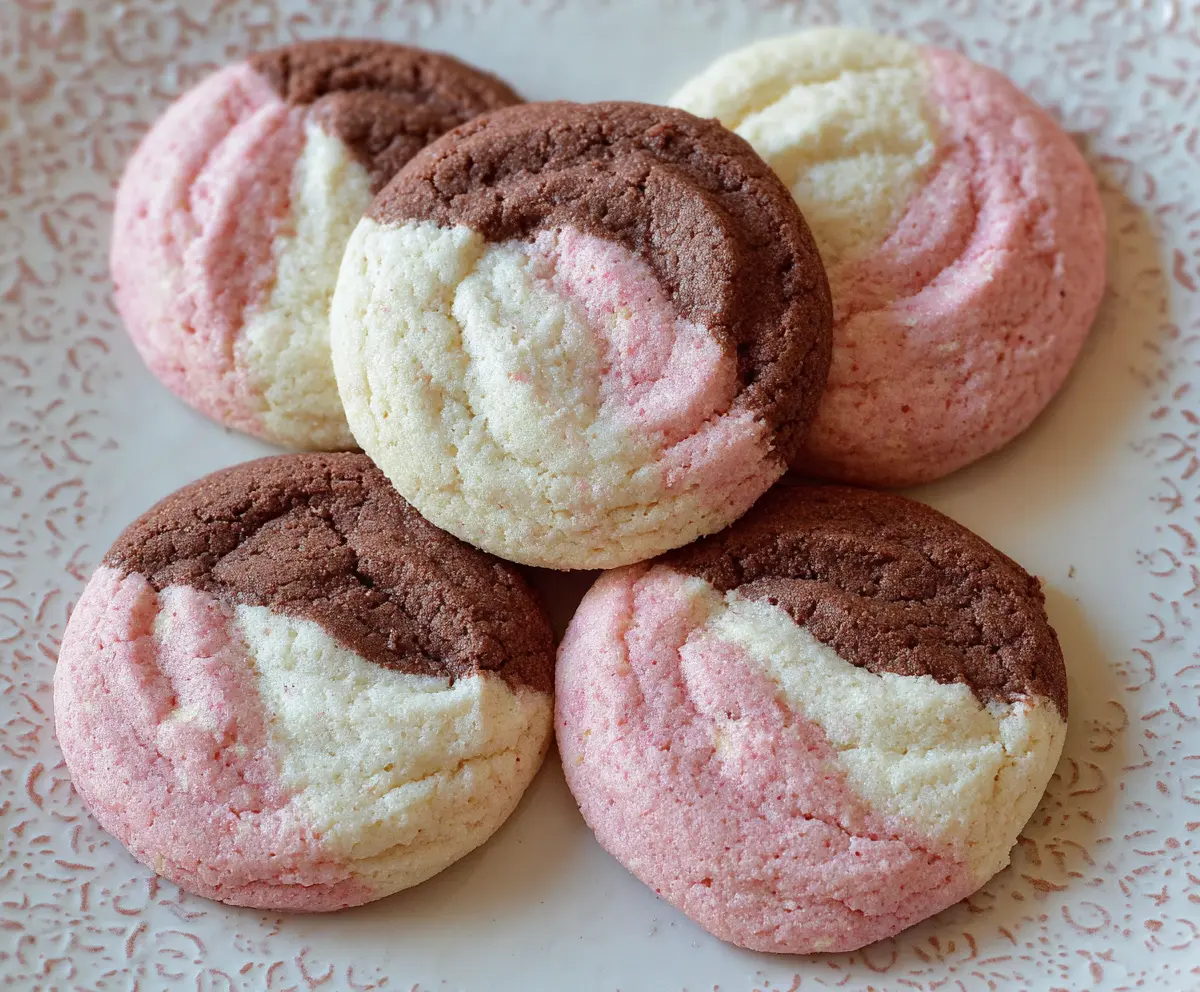
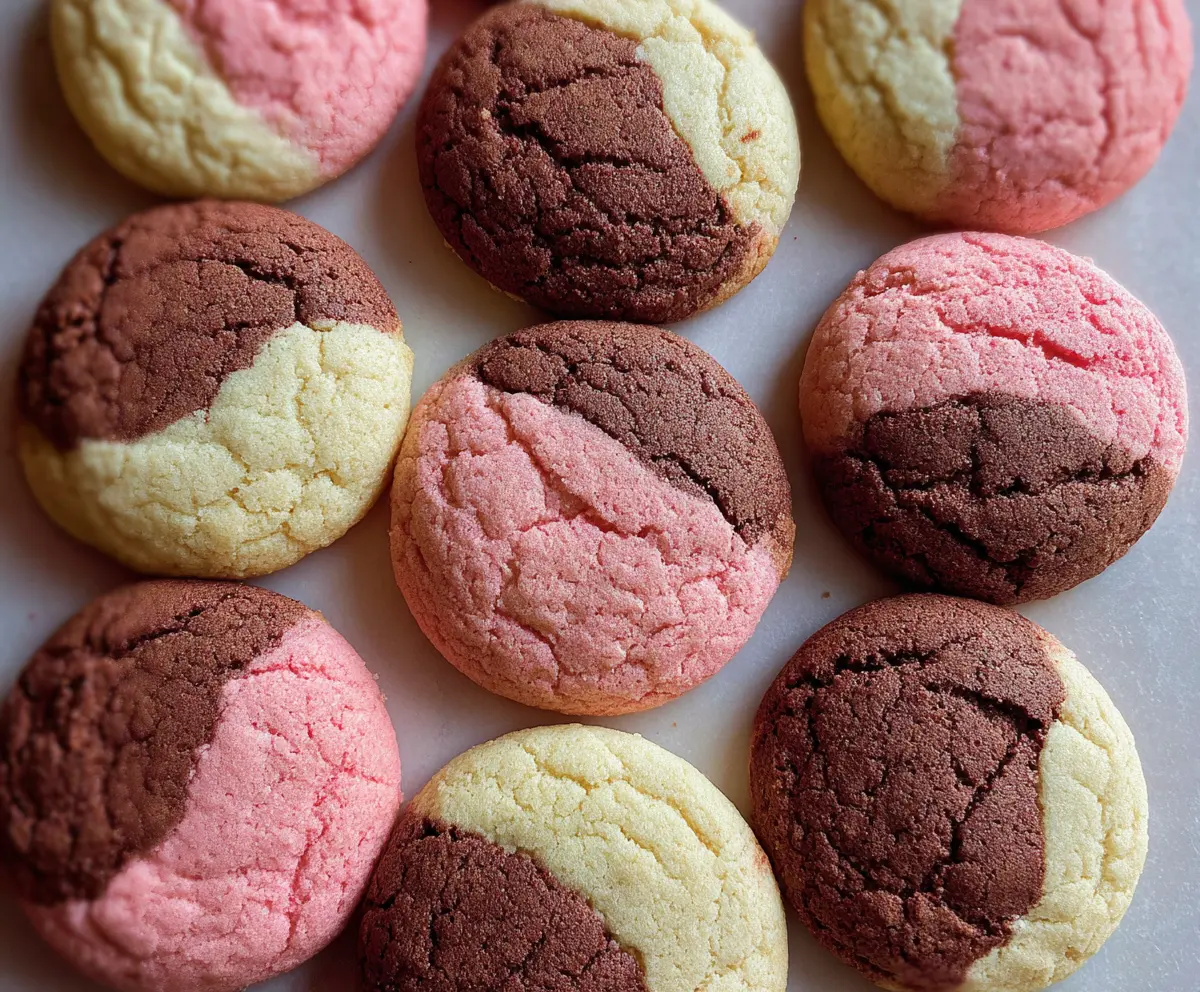
Neapolitan cookies are a fun treat that combines three delicious flavors: chocolate, vanilla, and strawberry! They are soft, colorful, and perfect for sharing.
Making them is like a little art project, layered just right! I love how each bite gives a mix of all three flavors—it’s like a party in your mouth! 🎉
Key Ingredients & Substitutions
Flour: All-purpose flour is essential for the right texture. If you’re gluten-free, consider using a gluten-free all-purpose blend instead. I’ve tried this with good results!
Butter: Unsalted butter is preferred to control the salt content. If you’re in a pinch, feel free to use margarine or coconut oil, though this may slightly change the flavor.
Strawberry Gelatin Powder: This gives a fruity flavor and a lovely pink color. If you can’t find it, use strawberry extract with a few drops of pink food coloring instead. My personal choice for this is the extract as it adds a more natural taste.
Cocoa Powder: Unsweetened cocoa powder is a must for rich chocolate flavor. If you want a lighter chocolate taste, use Dutch-processed cocoa powder instead for a less bitter flavor.
How Do You Achieve the Perfect Cookie Dough Consistency?
Getting the dough just right is vital for those perfect Neapolitan cookies. Here are some tips:
- Mix the butter and sugar until light and fluffy; this means incorporating air for a tender texture.
- When adding the dry ingredients and milk, mix only until combined. Overmixing can make cookies tough.
- The dough should be soft but not sticky. If it feels too sticky, sprinkle in a bit more flour.
- Chill the dough! This step helps the cookies maintain their shape and enhances flavor.
How to Make Delicious Neapolitan Cookies
Ingredients You’ll Need:
For the Cookie Dough:
- 2 ¾ cups all-purpose flour
- 1 teaspoon baking powder
- ½ teaspoon salt
- 1 cup unsalted butter, softened
- 1 ½ cups granulated sugar
- 2 large eggs
- 1 teaspoon vanilla extract
- ¼ cup milk
For the Flavors:
- ⅓ cup unsweetened cocoa powder (for chocolate dough)
- ¼ cup strawberry gelatin powder (or strawberry flavoring with a few drops of pink food coloring)
- Additional pink food coloring (optional, for deeper pink tones)
How Much Time Will You Need?
This recipe takes about 20 minutes to prepare and about 10-12 minutes to bake. Additionally, allow at least 30 minutes for chilling the dough. Overall, you’ll spend approximately 1 hour and 15 minutes until you can enjoy your tasty cookies!
Step-by-Step Instructions:
1. Preheat and Prepare:
Start by preheating your oven to 350°F (175°C). Line your baking sheets with parchment paper to prevent sticking and make cleanup easier.
2. Mix the Dry Ingredients:
In a medium bowl, whisk together the all-purpose flour, baking powder, and salt. This helps to evenly distribute the leavening agent and salt. Set your flour mixture aside for later.
3. Cream the Butter and Sugar:
In a large mixing bowl, use a mixer to cream the softened butter and granulated sugar together until the mixture is light and fluffy. This usually takes about 2-3 minutes. The fluffier the mixture, the better your cookies will be!
4. Add Eggs and Vanilla:
Beat in the eggs one at a time, making sure they’re well mixed after each addition. Then, add the vanilla extract and mix until combined.
5. Combine Wet and Dry Ingredients:
Slowly add the flour mixture to the butter mixture while alternating with the milk. Mix until just combined; be careful not to over-mix, as this can make the cookies tough.
6. Divide the Dough:
Now, divide your dough evenly into three bowls. This is where the fun begins!
7. Color and Flavor the Dough:
In the first bowl, mix in the cocoa powder until it’s fully incorporated to make the chocolate dough. In the second bowl, add the strawberry gelatin powder (and food coloring if you choose) for the strawberry dough. Leave the last bowl as plain vanilla dough.
8. Shape the Dough:
On a clean surface, roll each flavored dough into strips of similar size. Layer the chocolate, strawberry, and vanilla dough strips side by side and press them gently together.
9. Roll Into a Log:
Now, roll the combined dough into a log. Make sure that the colors stay distinct but stick together. This creates the beautiful swirls in the cookies!
10. Chill the Dough:
Wrap your dough log in plastic wrap and chill it in the refrigerator for at least 30 minutes. This helps solidify the dough, making it easier to slice.
11. Slice and Bake:
Once chilled, remove the dough from the refrigerator and slice it into ¼-inch thick rounds. Place the slices on the prepared baking sheets, leaving about 2 inches between each cookie.
12. Bake and Cool:
Bake the cookies in your preheated oven for 10-12 minutes, or until the edges are lightly golden, but the centers stay soft. Remove them from the oven and let them cool on the baking sheet for a few minutes before transferring to a wire rack to cool completely.
13. Enjoy!
Your colorful Neapolitan cookies with chocolate, vanilla, and strawberry flavors are ready to be devoured! Serve them fresh and enjoy the delightful blend of flavors!
Can I Use Different Flavoring for the Dough?
Absolutely! You can substitute the strawberry gelatin powder with any fruit flavor you like, such as raspberry or lemon. Just be mindful of the amount needed to achieve the desired flavor intensity.
What Should I Do If My Dough Is Too Sticky?
If your dough feels too sticky to handle, sprinkle in a little more flour, one tablespoon at a time, until it reaches a manageable consistency. Just be careful not to add too much, as this can make the cookies tough.
Can I Freeze the Dough?
Yes, you can! Wrap the dough log tightly in plastic wrap, then in aluminum foil, and freeze for up to 3 months. When you’re ready to bake, simply thaw it in the refrigerator overnight before slicing and baking as usual.
How Should I Store Leftover Cookies?
Store any leftover cookies in an airtight container at room temperature for up to a week. For longer storage, you can freeze the baked cookies as well, and just thaw them at room temperature when you want to enjoy them!