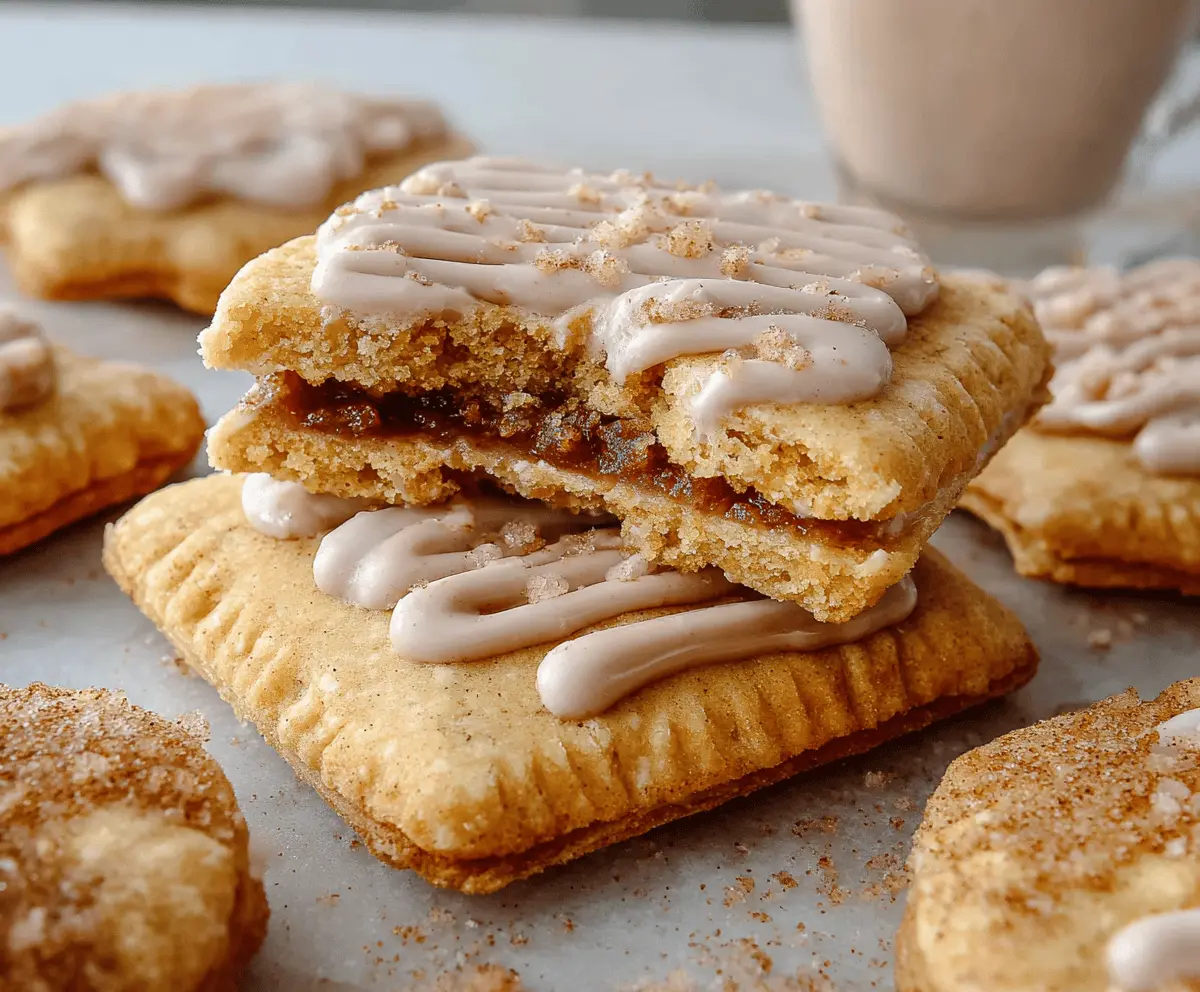
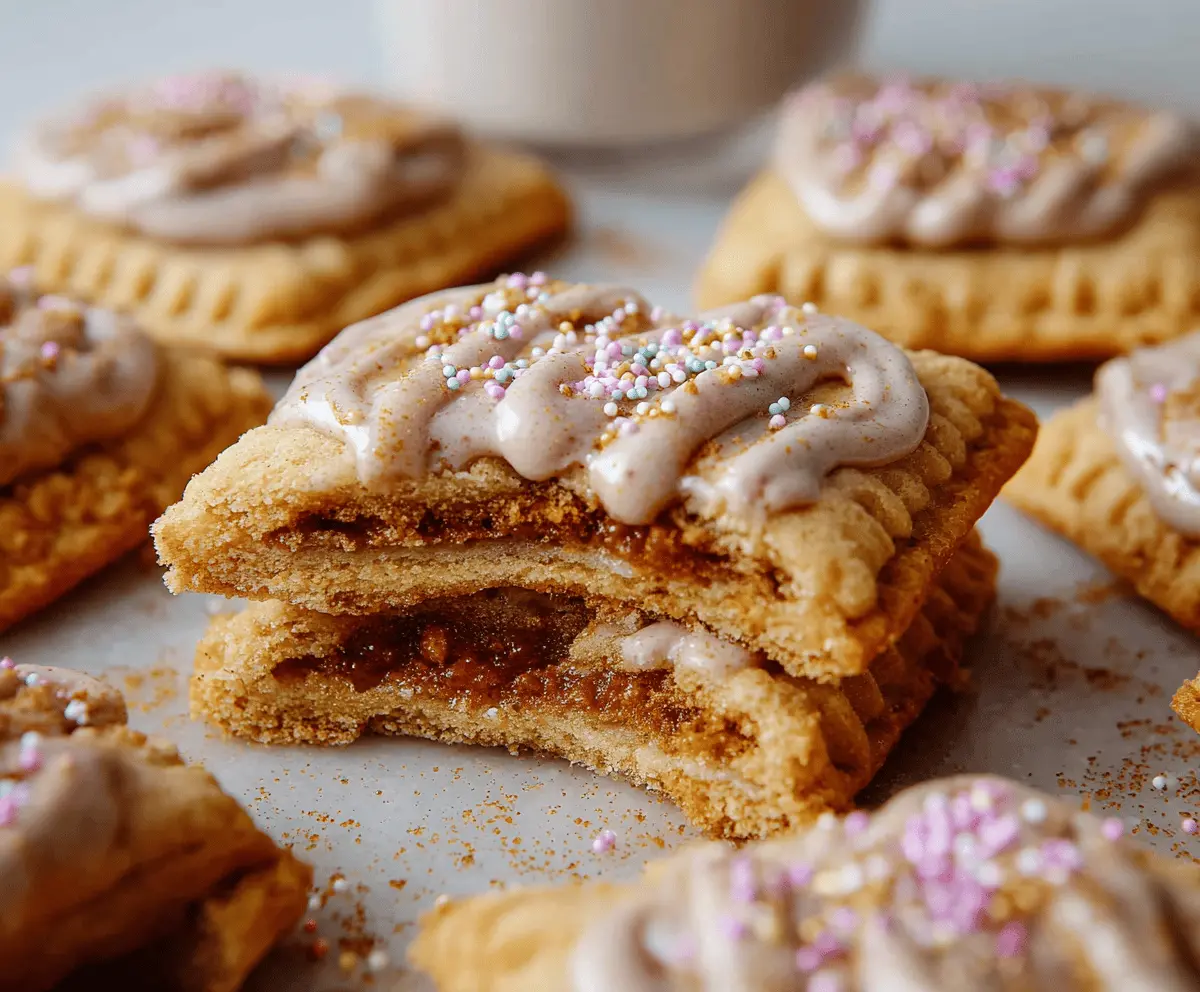
These Brown Sugar Pop Tart Cookies are a fun twist on a childhood favorite! They’re sweet, chewy, and filled with yummy brown sugar goodness.
Making these cookies is a blast! You can even get creative with the filling. Once they’re baked, I could easily eat a whole batch in one sitting—don’t judge me! 😄
Key Ingredients & Substitutions
Unsalted Butter: You’ll want to use softened unsalted butter for the best flavor. If you’re out of this, margarine can be a substitute, but the texture might change a bit. I find that butter gives the cookies a richer taste!
Brown Sugar: Light brown sugar adds a lovely sweetness and moisture. If you only have dark brown sugar, it can be used too, giving the cookies a richer flavor. I love mixing both types for added depth!
Flour: All-purpose flour works best here, but if you want a gluten-free option, you could try using a 1:1 gluten-free baking mix. Just be sure it’s formulated for baking to get similar results!
Cinnamon: The ground cinnamon is key for that Pop Tart vibe. If you want to mix it up, try adding a pinch of nutmeg for extra warmth.
How Do I Roll the Dough Properly?
Rolling out the dough can feel tricky, but you just need a little practice and patience. Here’s how to do it right:
- Start with two sheets of parchment paper—this prevents sticking.
- Place a dough half between the sheets and use a rolling pin to gently roll to about 1/8 inch thick.
- Keep the dough moving! If it’s sticking, lift the parchment slightly and sprinkle a little flour underneath.
- Once rolled, carefully remove the top layer of parchment. It’s okay if the edges aren’t perfect; you can trim them later!
Remember, if the dough gets too warm, pop it in the fridge for a few minutes before rolling again. Happy baking!
Brown Sugar Pop Tart Cookies
Ingredients You’ll Need:
For the Cookie Dough:
- 1 cup (2 sticks) unsalted butter, softened
- 1 cup packed light brown sugar
- 1/2 cup granulated sugar
- 1 large egg
- 1 teaspoon vanilla extract
- 3 cups all-purpose flour
- 1 teaspoon baking powder
- 1/2 teaspoon salt
For the Filling:
- 1/4 cup brown sugar
- 1 teaspoon ground cinnamon
- 2 tablespoons unsalted butter, melted
- 1/8 teaspoon salt
- 1 teaspoon vanilla extract
For the Glaze:
- 1 cup powdered sugar
- 1/2 teaspoon ground cinnamon
- 1-2 tablespoons milk or cream
- 1/2 teaspoon vanilla extract
- Sprinkles, for decoration (optional)
How Much Time Will You Need?
This delightful recipe takes about 20 minutes of prep time, plus 12-15 minutes for baking. Once baked, allow some time for cooling and glazing, making it around 45 minutes to an hour overall. Perfect for a weekend treat or a fun baking session with friends or family!
Step-by-Step Instructions:
1. Preheat and Prepare:
Start by preheating your oven to 350°F (175°C). Line your baking sheets with parchment paper to prevent sticking. This little step will make clean-up a breeze!
2. Make the Dough:
In a large mixing bowl, cream together the softened butter, light brown sugar, and granulated sugar until the mixture is light and fluffy—this usually takes about 2-3 minutes. Next, beat in the egg and add the vanilla extract until fully mixed in.
3. Combine Dry Ingredients:
In another bowl, whisk together the all-purpose flour, baking powder, and salt. Gradually mix these dry ingredients into the butter mixture. Stir until a dough forms—be careful not to overmix, or the cookies might be tough!
4. Roll Out the Dough:
Divide the dough in half. Roll each half between two sheets of parchment paper, into a large rectangle about 1/8 inch thick. If the dough feels sticky, you can refrigerate it for a bit before rolling to make it easier to handle.
5. Prepare the Filling:
Once you have your dough rolled out, peel off the top layer of parchment paper. Brush one sheet of dough lightly with the melted butter. In a small bowl, mix together the filling ingredients: brown sugar, cinnamon, salt, and vanilla. Sprinkle this mixture over the buttered dough evenly.
6. Assemble the Cookies:
Carefully place the second sheet of rolled dough on top of the filling and gently press down. Use a cookie cutter or sharp knife to cut the dough into rectangular shapes that resemble Pop-Tarts.
7. Crimp and Vent:
Using a fork, gently crimp the edges of each cookie to seal them, and poke a few holes on the top to allow steam to escape during baking—this way, they won’t puff up too much!
8. Bake!
Arrange the cookies on your prepared baking sheets, making sure to leave some space between them. Bake in your preheated oven for 12-15 minutes or until they are lightly golden around the edges.
9. Cool and Glaze:
Once baked, allow the cookies to cool completely on a wire rack. While they’re cooling, whisk together the glaze ingredients until you achieve a smooth consistency. You want it thin enough to drizzle but thick enough to stick!
10. Finish with Fun:
Once the cookies are cool, drizzle the glaze over the top and add some colorful sprinkles if you like. Let the glaze set for just a few minutes before serving!
And there you have it! These Brown Sugar Pop Tart Cookies are sure to delight with their sweet flavor and chewy texture. Enjoy your delicious creation! 🍪✨
Can I Use a Different Type of Sugar?
Yes! If you don’t have light brown sugar, dark brown sugar can be used as a substitute, though it will give the cookies a deeper flavor. Granulated sugar can also work, but it won’t provide the same moisture and taste.
What If My Dough is Too Sticky?
If your dough feels sticky and hard to work with, don’t worry! Just sprinkle a little flour on the surface and your rolling pin. Alternatively, you can chill the dough in the refrigerator for about 30 minutes to make it easier to handle.
How Should I Store Leftover Cookies?
Store leftover cookies in an airtight container at room temperature for up to 3 days. For longer storage, you can freeze them. Just wrap them individually and place them in a freezer bag—thaw at room temperature before enjoying!
Can I Customize the Filling?
Absolutely! Feel free to get creative with your filling. You can try adding chocolate chips, chopped nuts, or even fruit preserves for a different twist. Just make sure not to overfill to prevent leaks while baking!